Setting up a modern payment system may look complicated at first, especially when you are dealing with both software and hardware working together. However, once you understand how each part connects, the process becomes very clear and manageable. The combination of a smart POS system and a portable payment terminal is designed to make everyday transactions smooth, fast, and secure.
The Ovvi POS system works as the main control center for your sales, orders, and business management, while the PAX A920 Pro acts as the device that actually processes card payments. When both are properly connected, you get a complete setup that can handle customer payments anywhere in your store or service area without hassle.
Understanding How the System Works
Before going into setup steps, it is helpful to understand how both systems interact.
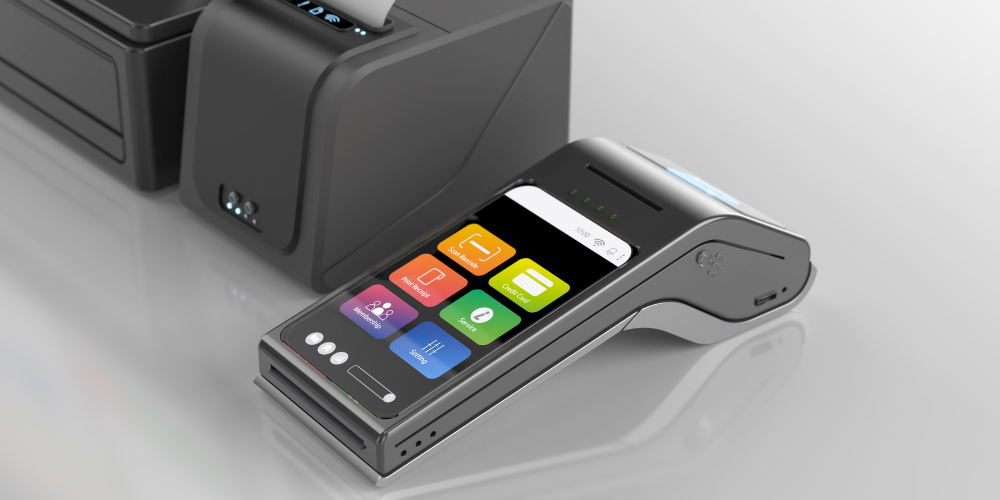
The PAX A920 Pro is a handheld Android-based payment terminal. It is used for accepting chip cards, swipe cards, and contactless payments. It also prints receipts and connects to the internet using Wi-Fi or mobile data. Since it runs on Android, it can also support POS applications and payment integrations.
On the other side, the POS system is where you manage your business operations. This includes creating sales, managing products, tracking payments, and viewing reports. When connected, the POS sends payment requests to the PAX device, and the device completes the transaction securely.
Together, they form a connected payment system that helps reduce manual work, improves speed at checkout, and keeps everything organized in one place.
Preparing the PAX A920 Pro Device
Before starting the software setup, the device itself needs to be ready for use.
First, unbox the terminal carefully and check if all parts are included. The device usually comes with a charging cable, power adapter, and built-in battery. Make sure the device is not physically damaged and that the screen is clean.
Next, power on the device by holding the power button for a few seconds. If the battery is low, connect it to the charger and allow it to charge before continuing setup. It is better to start with a good battery level to avoid interruptions during configuration.
Once the device is on, it will boot into its Android home screen. From here, you can access settings, network options, and installed applications.
Connecting the Device to Wi-Fi
A stable internet connection is very important for payment processing.
To connect the device, open the settings menu and go to the network section. Turn on Wi-Fi and select your business network. Enter the correct password and wait for the connection to establish.
Once connected, you will see the Wi-Fi icon on the screen. A stable connection ensures that transactions are processed without delay and that the POS system can communicate with the terminal properly.
Installing and Accessing the POS Application
After the hardware is ready, the next step is setting up the POS application.
Depending on your setup, the application may already be installed on the device. If it is not, it can be installed through the device’s app management system or provided installation package. Once installed, open the application and allow all required permissions so it can function correctly.
Now log in using your business account credentials. After login, the system may take a few moments to load your store settings, products, and payment configurations.
At this stage, the POS system is ready to be connected with the payment terminal.
Connecting POS with PAX A920 Pro
This is the most important step in the entire setup process because it links the payment system with the sales system.
Inside the POS settings, go to the payment or device section. Here you will find an option to connect an external payment terminal. Choose the PAX device option and proceed with connection settings.
In most cases, both devices must be connected to the same Wi-Fi network. The POS system will search for available devices and display the terminal. Once you select it, the connection will be established.
At this stage, it is important to confirm that both systems are communicating properly. A successful connection means that the POS can now send payment requests directly to the terminal without manual input.
For businesses looking for a ready-to-use solution, this setup works seamlessly with modern systems like Ovvi Pax A920 Pro, which is designed to support smooth integration between POS software and payment hardware in a single setup.
Setting Up Payment Options
After connecting the systems, the next step is configuring how payments will work.
You can enable different payment types depending on your business needs. These usually include chip card payments, swipe payments, and contactless tap payments. You can also decide whether to allow tips, split payments, or manual entry in special cases.
Receipt settings can also be adjusted. You may choose to print receipts directly from the terminal or send digital receipts through email or SMS depending on customer preference.
It is important to test these settings to make sure everything is working correctly before going live.
Running a Test Transaction
Before using the system with real customers, it is always recommended to perform a test transaction.
Start by adding a sample product in the POS system. Proceed to checkout and select card payment. The request will automatically be sent to the PAX terminal.
The customer (or tester) can then insert, tap, or swipe a card on the device. If everything is set up correctly, the payment will be approved, and a receipt will be generated.
This step helps confirm that the POS and payment terminal are fully synced and ready for daily use.
Fixing Common Setup Issues
Sometimes, small issues may occur during setup, but most of them are easy to fix.
If the POS system cannot find the terminal, first check if both devices are on the same Wi-Fi network. Restarting both devices often solves this problem.
If payments are not going through, confirm that the internet connection is stable and that the payment settings are correctly configured in the POS system.
In case the application freezes or behaves unexpectedly, restarting the device or clearing the app cache usually helps.
Printer issues can also happen sometimes. In such cases, check if the paper roll is installed correctly and ensure the printer cover is closed properly.
Best Practices for Smooth Operation
To keep the system running smoothly every day, a few simple habits can make a big difference.
Keep the device updated so it always has the latest security and performance improvements. Make sure the Wi-Fi connection is stable and avoid using weak networks during busy hours.
It is also a good idea to restart the device regularly to clear temporary system issues. Keeping the hardware clean, especially the card reader and printer area, helps maintain performance over time.
Finally, restrict access to settings so only authorized users can make changes to the system.
Advanced Features You Can Use Later
Once the basic setup is complete, you can explore more advanced features to improve business operations.
You can track sales in real time, manage inventory, and generate daily or weekly reports. Some setups also allow multiple users with different access levels, which is helpful for teams.
Refunds, void transactions, and split payments can also be managed directly from the POS system, making operations more flexible and efficient.
Final Thoughts
Setting up the Ovvi POS system with the PAX A920 Pro is not as difficult as it may first appear. Once you understand how the hardware and software connect, the entire process becomes logical and easy to follow.
The key steps include preparing the device, connecting it to Wi-Fi, installing the POS system, linking both systems together, and testing transactions. After that, the setup is ready for daily use.
With a properly configured system, businesses can handle payments faster, reduce errors, and improve the overall customer experience at checkout.
