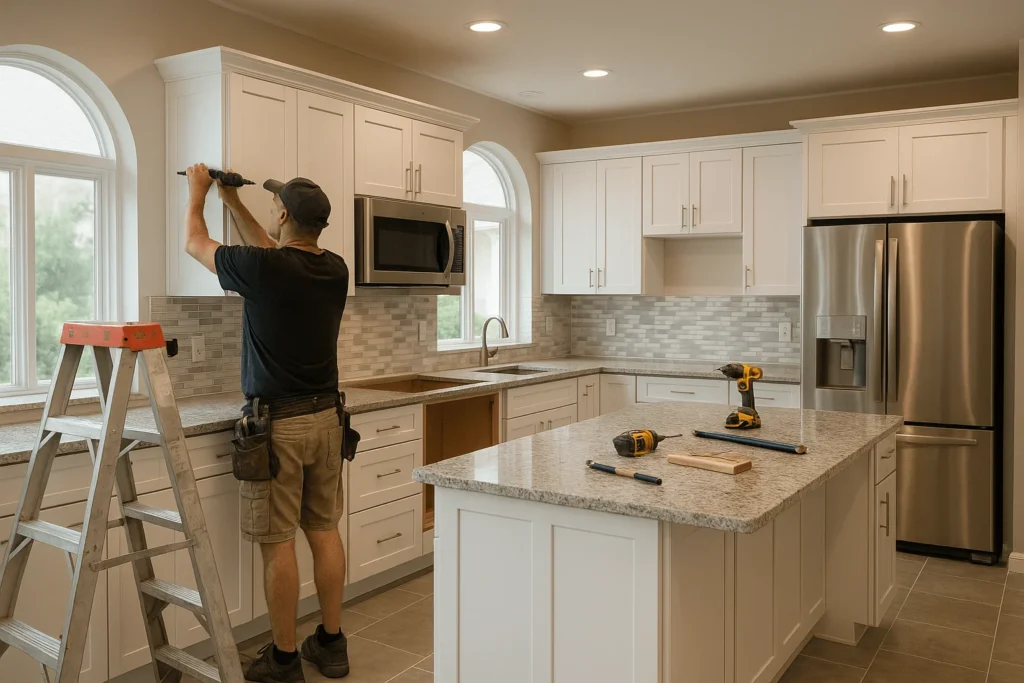
Few home projects feel as disruptive as a torn-up kitchen, and few go wrong as easily when steps happen out of sequence. A countertop installed before the plumbing is finalized, or flooring laid before the cabinets are planned, can mean costly rework. Hiring expert kitchen remodeling services helps, but understanding the sequence yourself keeps you in control. This guide walks through each phase in order and explains why the sequence matters.
Start With Planning, Budget, and Design
Every successful remodel begins on paper. Before anyone swings a hammer, you need a clear scope, a realistic budget, and a finished design. Changing your mind after demolition is the most common reason projects run over time and over budget.
Measure the Space and Settle the Layout
Start with accurate measurements and a layout that fits how you cook. Decide whether you are keeping the existing footprint or moving the sink, range, or refrigerator. Moving plumbing and gas lines costs far more than swapping cabinets in place, so this one decision shapes your budget more than almost any other.
Order Long-Lead Items Early
Cabinets, custom countertops, and some appliances can take weeks to arrive, and lead times vary by supplier and season. Ordering before demolition prevents a gutted kitchen from sitting idle while you wait. Confirm exact appliance dimensions at this stage, because those sizes determine cabinet openings, outlet locations, and ventilation.
Secure Permits Before Any Work Begins
Permit rules differ by city and county, but structural changes, new electrical circuits, and plumbing or gas relocations commonly require approval. Your contractor usually handles the paperwork, though you should confirm who is responsible in writing.
Skipping permits can create problems when you sell the home or file an. Inspectors also check hidden work, such as wiring and pipes, before walls are closed. That makes permits part of your schedule, not just paperwork.
Prepare the Home and Demolish the Old Kitchen
Demolition is the first physical step, but preparation comes first. Crews should empty the cabinets, shut off the water, electricity, and gas to the affected areas, and set up dust barriers. Covering floors in adjoining rooms and sealing off vents keeps dust out of the rest of the house.
Most households also set up a temporary kitchen, often a table with a microwave, a small refrigerator, and a hot plate in another room. Planning this ahead makes the weeks without a kitchen much easier.
Check for Hazards Before Tearing Anything Out
Homes built before 1978 may contain lead-based paint, and older flooring, adhesives, or ceiling textures can contain asbestos. In older homes, have materials tested before demolition. In the United States, the EPA’s Renovation, Repair and Painting rule requires lead-safe work practices from certified firms in most pre-1978 homes. Disturbing these materials carelessly spreads dust through the entire house.
Once testing is clear, crews remove cabinets, countertops, fixtures, and any flooring or walls included in the plan.
Complete Structural and Layout Changes
With the room stripped back to its frame, structural work comes next. This includes removing or modifying a wall, installing a support beam, enlarging a window opening, or adding a doorway. Changes to load-bearing walls should be designed by a qualified professional and approved where required.
This phase comes before any utility work because new framing decides where pipes, wires, and ducts can run. Doing it later means opening finished walls again. Subfloor repairs belong here too, since rot or uneven areas are easiest to fix while everything is exposed.
Rough-In Plumbing, Electrical, and Ventilation
“Rough-in” means installing the hidden systems inside walls, floors, and ceilings before they are covered. It is the stage where your layout becomes real, and it is also where experienced crews earn their value.
Plumbers run supply and drain lines for the sink, dishwasher, and refrigerator water line. Electricians install circuits, boxes, and wiring for outlets, switches, appliances, and lighting. Many kitchens need dedicated circuits for the dishwasher, microwave, and range. Gas fitters handle any gas line for a range or cooktop.
Ventilation is easy to overlook. Your range hood needs a duct path, ideally to the outdoors, and that path must be planned before walls close. A kitchen with a powerful hood and no ducting plan is a common and frustrating oversight.
Because these trades overlap in tight spaces, good scheduling matters. This is where a well-organized expert kitchen remodeling team coordinates plumbers, electricians, and framers so they do not block one another.
Pass Inspections, Then Insulate and Close the Walls
After rough-in, a local inspector typically checks the plumbing, electrical, and mechanical work before it is covered. Passing this inspection is your green light to continue. Failing it is far cheaper to fix now than after drywall goes up.
Next comes insulation where needed, particularly in exterior walls. Drywall follows, with the seams taped, mudded, and sanded smooth. Drywall dust spreads widely, so this step is another reason to keep dust barriers in place. Once the surfaces are smooth, crews prime the walls and ceiling.
Flooring: Before or After the Cabinets?
This is one of the most debated points in the sequence, and the honest answer is that it depends on the material.
Many remodelers install tile, hardwood, or luxury vinyl before cabinets so the floor looks continuous and a future cabinet change does not require patching. Others prefer to set cabinets first to protect brand-new flooring from heavy installation traffic, then lay the floor up to the cabinet bases. Floating floors that must expand and contract are generally not pinned under heavy cabinetry, so they are often installed after cabinets or kept clear of them.
Whichever approach you choose, agree on it before work begins. Ask your contractor to explain the reasoning, particularly if you plan to replace appliances or cabinets down the road. If the floor goes in early, cover it well to prevent scratches and chips.
Paint, Cabinets, Countertops, and Backsplash
This stretch is where the kitchen starts to look like a kitchen, and the order inside it is strict.
Paint Comes Before Cabinets
Ceilings and walls are painted first, before cabinets arrive, so crews are not working around finished cabinetry. A final touch-up coat later covers minor scuffs from installation.
Cabinet Installation
Installers usually hang the upper cabinets first so they can work without lower units in the way, then set the base cabinets. Walls are rarely perfectly flat or level, so careful shimming and leveling here affect everything that follows. Even a small error can leave visible gaps in the countertop or make doors hang unevenly.
Countertop Templating and Installation
Countertops are measured after the cabinets are installed, not before. Stone, quartz, and solid-surface tops are cut to the actual installed dimensions, which is why accurate cabinet placement matters. Fabrication usually takes from several days to a few weeks depending on the material and shop schedule, so build that gap into your timeline. Ask whether the sink cutout will be done by the fabricator and make sure your sink and faucet are on site when the template is made.
Backsplash Last
The backsplash goes in after the countertops so it meets the surface cleanly. Installers then grout and seal it where needed. Putting it in earlier risks damage from countertop installation and leaves awkward gaps.
Install Fixtures, Appliances, and Finish Work
Now the visible components go in. Plumbers connect the sink, faucet, garbage disposal, and dishwasher. Electricians install outlets, switch plates, under-cabinet lighting, and fixtures. Appliances are set in place and connected, and the range hood is mounted and vented.
Cabinet hardware, trim, crown molding, and baseboards are added next. Doing this late protects the finished surfaces from damage during earlier, rougher stages. A final round of paint touch-ups and a thorough cleaning follow.
The Final Inspection and Punch List
After the work is complete, a final inspection may be required to close out the permit. Then comes the punch list, which is simply a walkthrough where you and the contractor list anything unfinished or imperfect. Typical items include a sticking drawer, an uneven caulk line, a chipped edge, or a missing outlet cover.
Test everything before signing off. Run the faucets, check for leaks under the sink, switch on every light, and operate each appliance. Keep your warranty paperwork and appliance manuals in one place.
Kitchen Remodeling Sequence at a Glance
The table below summarizes the order of work and the reason each step sits where it does. Use it as a checklist when reviewing a contractor’s schedule.
| Order | Phase | What Happens | Why It Comes Here |
|---|---|---|---|
| 1 | Planning and design | Scope, budget, layout, product selection | Prevents costly changes mid-project |
| 2 | Permits and ordering | Approvals filed; cabinets and appliances ordered | Long lead times can delay work |
| 3 | Demolition | Old cabinets, fixtures, and finishes removed | Exposes the structure and utilities |
| 4 | Structural work | Framing, beams, openings, subfloor repairs | Utilities depend on the final frame |
| 5 | Rough-in | Plumbing, electrical, gas, ventilation | Must be done before walls close |
| 6 | Inspection, insulation, drywall | Hidden work checked, walls closed and primed | Inspectors need access to open walls |
| 7 | Flooring and paint | Floor installed (timing varies); walls painted | Clean surfaces before cabinets arrive |
| 8 | Cabinets | Uppers and bases hung and leveled | Sets the foundation for countertops |
| 9 | Countertops and backsplash | Templated, fabricated, installed, tiled | Needs exact cabinet dimensions |
| 10 | Fixtures and appliances | Sink, lighting, appliances connected | Protects finished surfaces |
| 11 | Final inspection and punch list | Permit closed; defects corrected | Confirms everything works |
Sequencing Mistakes That Cost Homeowners Time and Money
A few errors show up again and again. Ordering cabinets after demolition leaves you without a kitchen for weeks. Choosing a new appliance late can invalidate cutouts and electrical placement. Skipping the final template check can lead to a countertop that does not fit. And approving lighting locations after drywall means opening finished walls.
Weather, supply delays, and inspection schedules can also push dates, so treat any timeline as an estimate. Leave some buffer, especially before a holiday or event.
Working With Professionals to Keep the Order on Track
An organized schedule is only as good as the people running it. When comparing contractors, ask how they sequence trades, who orders materials, and how they handle inspections. Look for written timelines, clear change-order procedures, and proper licensing where your state requires them.
Good expert kitchen remodeling professionals will explain why each step happens when it does and will warn you about decisions you need to make early. If a contractor cannot describe the sequence clearly, that is worth noting before you sign anything.
Conclusion
The right order for kitchen remodeling work is planning, permits, demolition, structural changes, rough-in, inspection, drywall, finishes, cabinets, countertops, backsplash, fixtures, and a final walkthrough. Each phase protects the next, and rearranging them usually creates delays or repair costs. Make your design decisions early, order long-lead items before demolition, and confirm the flooring plan with your contractor in advance. A clear schedule will not make a remodel effortless, but it will make the process predictable. Use the table above as a conversation starter with your contractor, and ask questions until the sequence makes sense to you.
Frequently Asked Questions
1. How long does a typical kitchen remodel take?
It depends on size, scope, and material lead times. A cosmetic update can take a few weeks, while a full remodel with layout changes often takes several months, including design and ordering. Ask your contractor for a written schedule.
2. Should I order cabinets before demolition starts?
Yes, in most cases. Cabinets and custom items can take weeks to arrive, and ordering early prevents your kitchen from sitting unfinished while you wait.
3. Do I need permits for a kitchen remodel?
Often, yes. Structural changes, new circuits, and moved plumbing or gas lines commonly require permits, but rules vary by location. Check with your local building department.
4. Do countertops go in before or after the backsplash?
Countertops go first. The backsplash is installed afterward so it sits cleanly against the finished surface.
5. Can I live in my home during a kitchen remodel?
Usually, yes, with some planning. Set up a temporary kitchen in another room, use dust barriers, and expect noise, limited water access at times, and some days when the kitchen is unusable.